11kV Dry Type Transformer Installation Requirements: A Complete Step-by-Step Guide
Time:2026-07-20 Auther:ZTelec-www.ztelectransformer.com
Proper installation is one of the most critical factors affecting the safety, efficiency, and service life of an 11kV dry type transformer. Whether installed in industrial plants, commercial buildings, hospitals, data centers, renewable energy facilities, or utility substations, a correctly installed transformer delivers reliable power distribution while minimizing maintenance costs and operational risks.
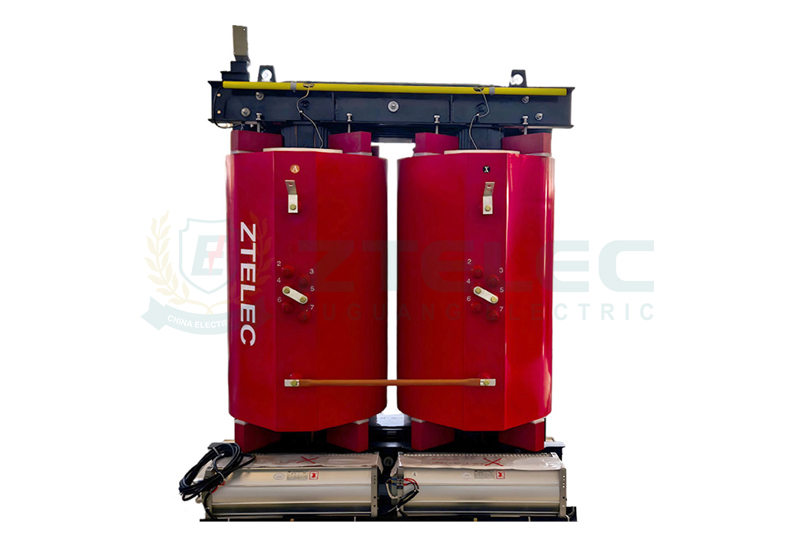
Unlike oil-filled transformers, dry type transformers rely entirely on natural or forced air cooling and use solid insulation systems such as cast resin or Vacuum Pressure Impregnation (VPI). These characteristics make them environmentally friendly, fire-resistant, and suitable for indoor installations. However, they also require strict compliance with installation specifications to achieve optimal performance throughout their 25 to 30-year service life.
This guide explains the complete installation process for an 11kV dry type transformer, from site preparation to commissioning, while highlighting common installation mistakes and industry best practices.

Why Proper Installation Is Critical
The performance of a dry type transformer depends not only on manufacturing quality but also on installation quality. Improper installation can reduce transformer efficiency, shorten insulation life, and increase the likelihood of unexpected failures.
Common problems caused by poor installation include overheating due to inadequate ventilation, insulation deterioration caused by moisture or dust contamination, loose electrical connections that generate excessive heat, excessive vibration resulting from uneven foundations, and premature aging of transformer components.
Following a standardized installation procedure helps maximize equipment reliability, reduce maintenance requirements, and ensure compliance with IEC, IEEE, and local electrical standards.
Step 1: Site Planning Before Delivery
Successful installation begins long before the transformer arrives at the project site.
Review all manufacturer drawings, technical datasheets, weight information, dimensions, lifting instructions, and installation requirements to verify that the installation location is fully prepared.
Confirm that the transformer room or enclosure has been completed, provides sufficient structural strength, meets fire protection requirements, and offers adequate weather protection where applicable.
Ensure that the transformer foundation dimensions match the manufacturer’s recommendations and that cable trenches, cable entry points, and maintenance access routes are completed.
Delivery logistics should also be carefully planned, including crane capacity, forklift access, transportation routes, doorway dimensions, and equipment handling procedures.
Proper planning minimizes installation delays and avoids costly site modifications after delivery.
Step 2: Foundation Preparation and Transformer Positioning
The transformer should be installed on a rigid, level, vibration-free foundation capable of supporting its operating weight with an appropriate safety margin.
Most installations use reinforced concrete foundations or structural steel bases designed according to manufacturer specifications.
Anti-vibration pads are often installed beneath the transformer to reduce vibration transmission and operational noise.
The transformer should be accurately aligned with incoming and outgoing cable routes while maintaining adequate clearance for ventilation, inspection, and future maintenance.
Before securing the transformer, verify horizontal alignment using precision leveling equipment to eliminate mechanical stress on the winding structure.
Step 3: Receiving Inspection
After delivery, perform a comprehensive inspection before moving the transformer into its final position.
Inspect the enclosure, bushings, terminals, cooling ducts, and cast resin windings for visible transportation damage.
If the transformer is equipped with impact or tilt indicators, confirm that no excessive mechanical shock occurred during transportation.
Verify that the nameplate information—including voltage rating, power capacity, impedance, vector group, frequency, and tap settings—matches the purchase specifications.
Remove transportation brackets, locking devices, and protective packaging according to the manufacturer’s installation manual.
Any shipping damage should be documented immediately to support warranty and insurance claims.
Step 4: Mechanical Installation
Once positioned correctly, secure the transformer using the specified anchor bolts and tightening torque recommended by the manufacturer.
Install all supplied accessories, including protective covers, lifting point caps, wheels or wheel locks, enclosure panels, and safety barriers where applicable.
Maintain sufficient clearance around all sides of the transformer to ensure unrestricted airflow and safe operating access.
For enclosed installations, verify compliance with applicable electrical safety regulations regarding protective fencing, access control, and emergency escape routes.
Step 5: Electrical Connections
High-Voltage Connections
Use medium-voltage cable termination kits specifically designed for 11kV systems, including heat-shrink or cold-shrink stress control technology.
Verify phase sequence before making permanent connections and tighten all terminals according to the manufacturer’s specified torque values.
Maintain adequate electrical clearance between phases and between energized components and grounded structures.
Low-Voltage Connections
Select cables or busbars according to the transformer’s rated current while allowing additional capacity for future load expansion.
Verify correct neutral configuration and grounding method according to project requirements.
Confirm phase rotation and polarity before connecting downstream switchboards and distribution panels.
Grounding System
Connect the transformer enclosure securely to the facility grounding system using appropriately sized grounding conductors.
Measure grounding resistance to ensure compliance with national electrical codes and project specifications.
Where lightning exposure or switching surges are expected, install surge protection devices on the primary side to improve equipment protection.
Step 6: Ventilation and Cooling Requirements
Because dry type transformers depend entirely on air cooling, ventilation design directly influences operating performance and service life.
Ensure that all air intake and exhaust openings remain unobstructed and provide sufficient airflow based on the transformer’s total heat dissipation.
If forced-air cooling fans are installed, verify proper fan rotation, airflow direction, and automatic control functions.
Ambient room temperature should remain within the transformer’s rated operating limits under maximum design load.
Combustible materials, storage equipment, or construction debris should never block ventilation openings or cooling airflow.
Step 7: Pre-Energization Testing
Before energizing the transformer, comprehensive electrical testing should be completed to verify installation quality.
Recommended commissioning tests include insulation resistance measurements, winding resistance testing, transformer turns ratio (TTR) testing, phase sequence verification, polarity testing, grounding continuity testing, and functional testing of protection devices.
Temperature sensors, alarms, cooling fans, monitoring systems, and protection relays should all be verified for correct operation.
Test results should be compared with factory routine test reports to confirm that transportation and installation have not affected transformer performance.
Step 8: Energization and Commissioning
Initial energization should always be performed without load while monitoring transformer sound, vibration, current, voltage, and temperature.
If no abnormalities are detected, gradually increase the load while continuously monitoring operating parameters.
Confirm that protection relay settings, alarm values, and temperature monitoring systems operate according to design specifications.
Record baseline operating data, including winding temperature, ambient temperature, load current, and operating voltage, for future maintenance comparison.

Common Installation Mistakes
Many transformer failures originate from installation errors rather than manufacturing defects.
Common mistakes include insufficient ventilation clearance, improperly tightened electrical terminals, failure to perform insulation resistance testing before energization, uneven foundations causing excessive vibration, inadequate grounding systems, incorrect cable phase sequence, and failure to follow manufacturer installation clearances.
Avoiding these issues significantly improves transformer reliability and extends equipment service life.
Troubleshooting After Installation
If operational issues occur shortly after commissioning, systematic troubleshooting can quickly identify the root cause.
Excessive vibration or abnormal humming often indicates foundation alignment issues or loose anchor bolts.
High operating temperatures usually result from blocked ventilation, overloaded operation, or cooling fan failure.
Unexpected protection trips during energization may indicate insulation damage, incorrect wiring, or abnormal winding resistance.
Uneven load currents between phases should prompt verification of phase connections, load balancing, and downstream distribution circuits.
Best Practices for Long-Term Reliability
Although dry type transformers require significantly less maintenance than oil-filled transformers, periodic inspections remain essential.
Regularly inspect electrical connections, ventilation pathways, insulation cleanliness, grounding continuity, temperature monitoring systems, and cooling fans.
Routine thermal imaging inspections can identify loose electrical connections or abnormal heating before failures occur, helping maximize equipment reliability and minimize unexpected downtime.
Installing an 11kV dry type transformer requires careful planning, precise mechanical installation, accurate electrical connections, and comprehensive commissioning tests. Every stage—from site preparation and foundation construction to ventilation design and final energization—directly affects transformer performance, safety, and service life.
By following a structured installation process and complying with manufacturer recommendations together with IEC and local electrical standards, facility owners can significantly improve operational reliability while reducing maintenance costs throughout the transformer’s lifecycle.
For complex installations, utility substations, or first-time projects, partnering with an experienced transformer manufacturer or qualified electrical contractor ensures that every installation step meets industry best practices, resulting in safe, efficient, and reliable medium-voltage power distribution for decades.